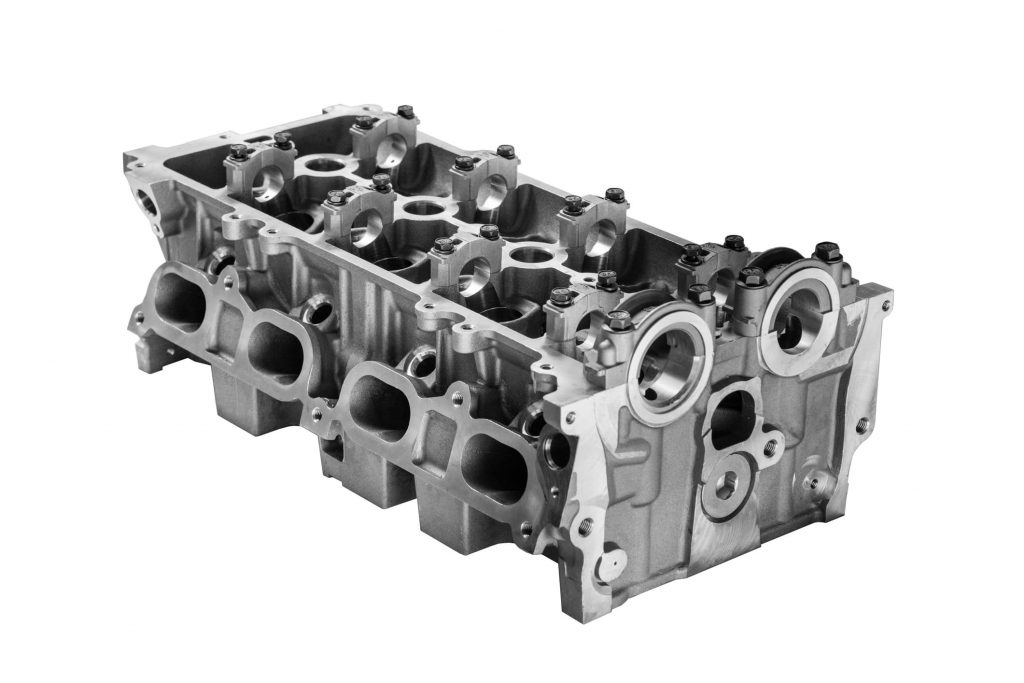
The cylinder head sits atop the engine block with the head gasket in between, sealing the cylinders to form the combustion chamber. It regulates fuel and air intake to ensure proper air-to-fuel ratio, expels exhaust gases, and connects to the intake and exhaust manifolds for optimal combustion and engine performance.
Due to high pressure and temperature changes, regularly cleaning your cylinder head is essential for maintaining engine performance and identifying potential issues early. Grease, oil, and debris can obscure cracks or holes that, if left unchecked, may lead to overheating and costly repairs. This guide will walk you through how to clean a cylinder head surface effectively and ensure optimal engine function.
Why cleaning a cylinder head is important
As previously mentioned, a clean cylinder head ensures easier inspection of cracks and proper sealing when reassembled. Whilst a layer of grease or oil can make it challenging to spot any cracks or holes within the cylinder head, this dirt and residue can also prevent the head gasket from forming a secure seal between the head and the block, increasing the risk of coolant and oil leaks. These leaks, which can often be resolved with K-Seal, can cause overheating, reduced lubrication, and severe engine damage over time.
The cylinder head also plays a crucial role in the engine cooling system as it provides channels for coolant to flow through, absorbing any heat generated by combustion. The grease and oil buildup can also reduce engine efficiency and cause damage by hindering this heat dissipation, potentially leading to engine overheating due to the buildup of carbon deposits obstructing the proper flow of coolant. This can then further damage the engine block by warping or cracking it.
Keeping both the cylinder head, head gasket, and engine block clean ensures proper sealing, efficient fuel combustion, and prolonged engine life. If you would like more information on head gasket maintenance, check out our head gasket repair guide as well as other articles about maintaining your cylinder head and engine block.
How to clean a cylinder head surface: step-by-step
1. Remove the cylinder head
Before cleaning, you must remove the cylinder head. This is a complex process that requires technical knowledge. If you’re unsure, seek professional assistance to avoid damage.
2. Choose the right cleaning agent
The material of your cylinder head determines the appropriate cleaning solution. Different metals react differently to chemicals and temperatures, so always choose a cleaner that’s compatible with your engine components. Here are the most common materials for cylinder heads and how to spot them:
- Aluminium cylinder heads: Much lighter than iron cylinder heads in both weight and colour. Usually a light grey and not magnetic. Aluminium is a softer metal so may be more prone to damage during the cleaning process.
- Iron cylinder heads: Heavier in weight and colour. Usually a dark grey, more prone to rusting and magnetic.
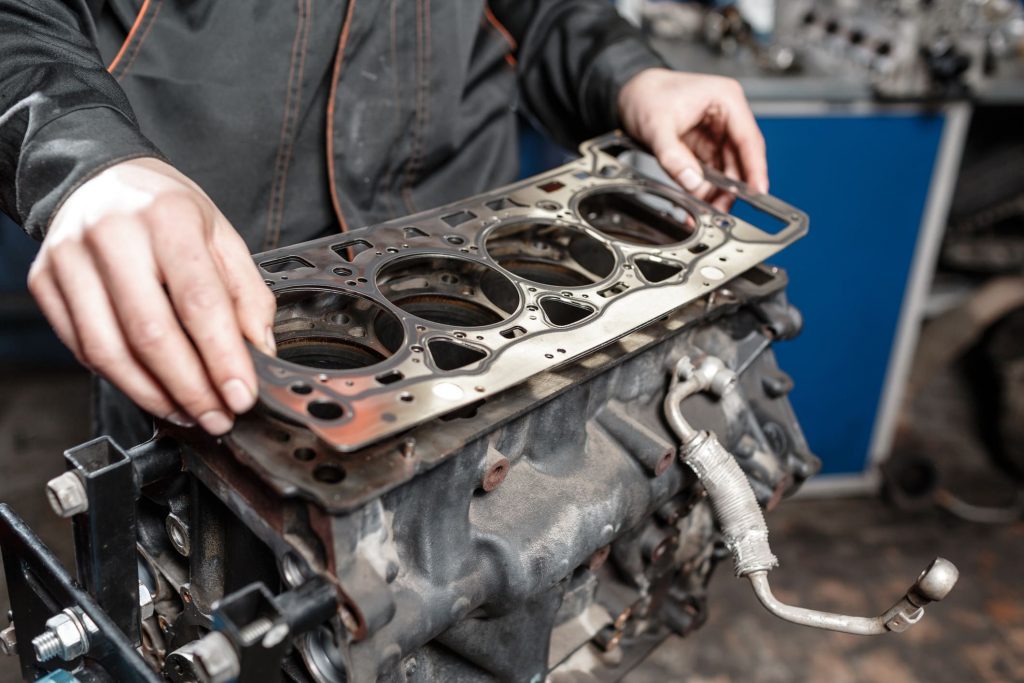
3. Remove old head gasket material
Use a plastic scraper to carefully remove any head gasket material off the cylinder head without scratching the surface. This ensures a perfect seal to prevent the risk of leaks when reinstalling the head.
If the cylinder head surface is damaged, you may wish to have it skimmed to restore the perfect finish.
4. Apply cleaning solution
Dampen a clean rag with the appropriate cleaning solution and wipe down the cylinder head surface. For hard-to-reach areas, carefully pour the cleaner into those parts of the head and allow it to penetrate the residue.
5. Submerge in warm water
Submerge the cylinder head in a bowl of warm-to-hot water for a few minutes to loosen stubborn grime. This step helps dislodge any remaining debris without causing damage.
6. Use a spray cleaner for internal areas
If some areas remain dirty, use a spray cleaner designed for engine components. This will help clean the internal passages more effectively.
7. Dry completely
Ensure the cylinder head is completely dry before inspecting and reinstalling it. If available, compressed air is ideal for drying internal areas, preventing moisture buildup that could cause rust or corrosion.
8. Inspect for cracks
Once clean and dry, carefully inspect the cylinder head for cracks. Spotting these early can help you address potential issues before they lead to major engine failures. If you notice damage, consider using K-Seal as a first step. If the damage appears extensive, we recommend consulting a professional mechanic for repairs or replacements.
9. Reinstall the cylinder head
Follow your vehicle’s manual to correctly reinstall the cylinder head. Ensuring a proper reinstallation will help maintain performance and prevent leaks.
By following these steps, you can ensure that your cylinder head remains clean and functional, helping you avoid unnecessary repairs and maintain optimal engine efficiency.
Preventative maintenance for cylinder heads
Once you’ve cleaned your cylinder head and ensured it’s not cracked, you must still check it regularly, especially if the car begins running hot or coolant levels start decreasing too quickly. Regularly cleaning and inspecting your cylinder head can prevent costly repairs.
For more expert guidance, explore our cylinder head maintenance tips and engine block guide. Keeping these components in top condition will extend the life of your engine and improve overall performance.